


Induction Hob Installation: A Step-by-Step Guide to Modern Kitchen Integration

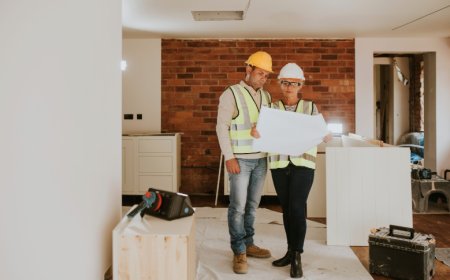
The decision to acquire an induction hob is an exciting step towards a more efficient, precise, and safe kitchen. However, for many, the practicalities of induction hob installation can seem daunting. Unlike a simple plug-and-play appliance, these sophisticated cooktops require careful consideration of electrical requirements, cabinetry modifications, and proper sealing.1 This article serves as a comprehensive guide to induction hob installation, outlining the crucial preparatory steps, the installation process itself, essential safety precautions, and why professional assistance is often recommended, especially in regions like Pakistan where specific electrical standards apply.
Before embarking on induction hob installation, thorough preparation is key. This initial phase is critical to ensure a smooth and safe process.
1. Verify Electrical Requirements (Crucial!): This is arguably the most critical step in induction hob installation. Induction hobs are high-power appliances and typically require a dedicated, high-amperage electrical circuit.2
* Voltage and Amperage: In Pakistan, while standard household voltage is 220-240V, the amperage required for an induction hob (often 30-50 amps) is significantly higher than a typical wall outlet. Most induction hobs cannot be simply plugged in; they require direct wiring to a dedicated circuit.
* Dedicated Circuit: This means a separate circuit breaker in your distribution board, exclusively for the hob.3 Sharing a circuit with other high-power appliances can lead to tripped breakers, performance issues, or even electrical hazards.4
* Professional Assessment: It is highly recommended to consult a qualified electrician before purchasing your hob to assess your home's existing electrical infrastructure. They can confirm if your current wiring and distribution board can support the hob's power demands or if an upgrade is necessary. This prevents purchasing a hob that cannot be safely installed.
2. Measure and Prepare the Countertop Cut-Out:
* Consult the Manual: Every induction hob comes with a detailed installation manual that specifies the exact dimensions for the countertop cut-out (the hole in your counter where the hob sits). These dimensions are critical and often slightly smaller than the hob's overall dimensions.
* Accuracy is Key: Measure meticulously. An incorrectly sized cut-out will lead to either a hob that doesn't fit or one that sits loosely, compromising aesthetics and stability.
* Material: Countertop materials like granite, marble, or engineered stone will require professional cutting services, as they cannot be cut with standard DIY tools. Laminate or wood countertops can often be cut with appropriate power tools, but precision is paramount.5
3. Ensure Adequate Ventilation and Clearance:
* Underside Clearance: Induction hobs generate heat in their electronics and require sufficient airflow beneath them for cooling. The manual will specify minimum clearance distances between the bottom of the hob and any cabinetry or appliances below it. Restricting airflow can lead to overheating, error codes, and reduced lifespan.6
* Side and Rear Clearance: There are also typically minimum clearance requirements from side walls and the rear splashback.7 Ensure these are met to prevent heat buildup and allow for proper installation.
* Extractor Hood: While induction hobs don't produce combustion fumes, good kitchen ventilation (e.g., an extractor hood) is still essential to remove cooking odors, steam, and grease, contributing to a cleaner and more pleasant kitchen environment.
The Induction Hob Installation Process (General Steps):
Disclaimer: While these steps provide a general overview, electrical work should ONLY be performed by a qualified and certified electrician. Incorrect wiring can lead to severe electrical shock, fire, or damage to the appliance.
-
Turn Off Power: The absolute first step for any electrical installation is to turn off the main power supply to your kitchen circuit at the distribution board. Test the wires with a voltage tester to ensure they are completely dead.
-
Place Hob in Cut-Out: Carefully lower the induction hob into the prepared countertop cut-out. Ensure it sits level and snugly.
-
Secure the Hob: Most induction hobs come with mounting clips or brackets that secure the hob to the underside of the countertop.8 Follow the manufacturer's instructions for tightening these to ensure the hob is stable and doesn't shift.
-
Electrical Connection (Professional Only):
-
The electrician will connect the hob's wiring to the dedicated electrical supply.9 This typically involves connecting specific wires (live, neutral, earth) according to the hob's wiring diagram and local electrical codes.
-
Proper grounding (earthing) is critical for safety.
Seal the Edges (Optional but Recommended): While not strictly part of the electrical installation, applying a bead of silicone sealant around the edges of the hob where it meets the countertop can prevent liquid spills from seeping underneath and causing damage to your cabinetry. Allow the sealant to cure fully before use.
Test the Hob: Once all connections are made and secured, turn the main power supply back on. Test all cooking zones and functions of the induction hob to ensure everything is working correctly. Check for any error codes or unusual noises.
Why Professional Installation is Recommended (Especially in Pakistan):
-
Electrical Safety: As highlighted, induction hobs require specific electrical setups.10 A qualified electrician understands local wiring regulations (e.g., Pakistan Electrical Wiring Rules) and can ensure safe, compliant, and correctly sized wiring. This mitigates the risk of short circuits, fires, or electrical shocks.
-
Warranty Compliance: Many manufacturers require professional installation to validate the appliance's warranty. DIY electrical work can void your warranty.
-
Optimal Performance: Correct wiring and adequate power supply are crucial for the hob to deliver its advertised efficiency and precision. An expert ensures this.
-
Damage Prevention: Professionals are equipped to handle the appliance and countertop without causing accidental damage during the installation process.
-
Troubleshooting: If issues arise immediately after installation, a professional can quickly diagnose and rectify problems.
In conclusion, induction hob installation is a process that demands meticulous attention to detail, particularly regarding electrical safety. While the promise of an efficient, precise, and safe cooking experience is exciting, prioritizing proper installation is paramount. By understanding the electrical requirements, preparing your space correctly, and entrusting the electrical connections to a certified professional, you can ensure your new induction hob is integrated seamlessly and safely into your modern kitchen, ready to unlock its full culinary potential for years to come.